
1. Open Objective Examination
From the current consultation, select Objective Examination from the Assess section.
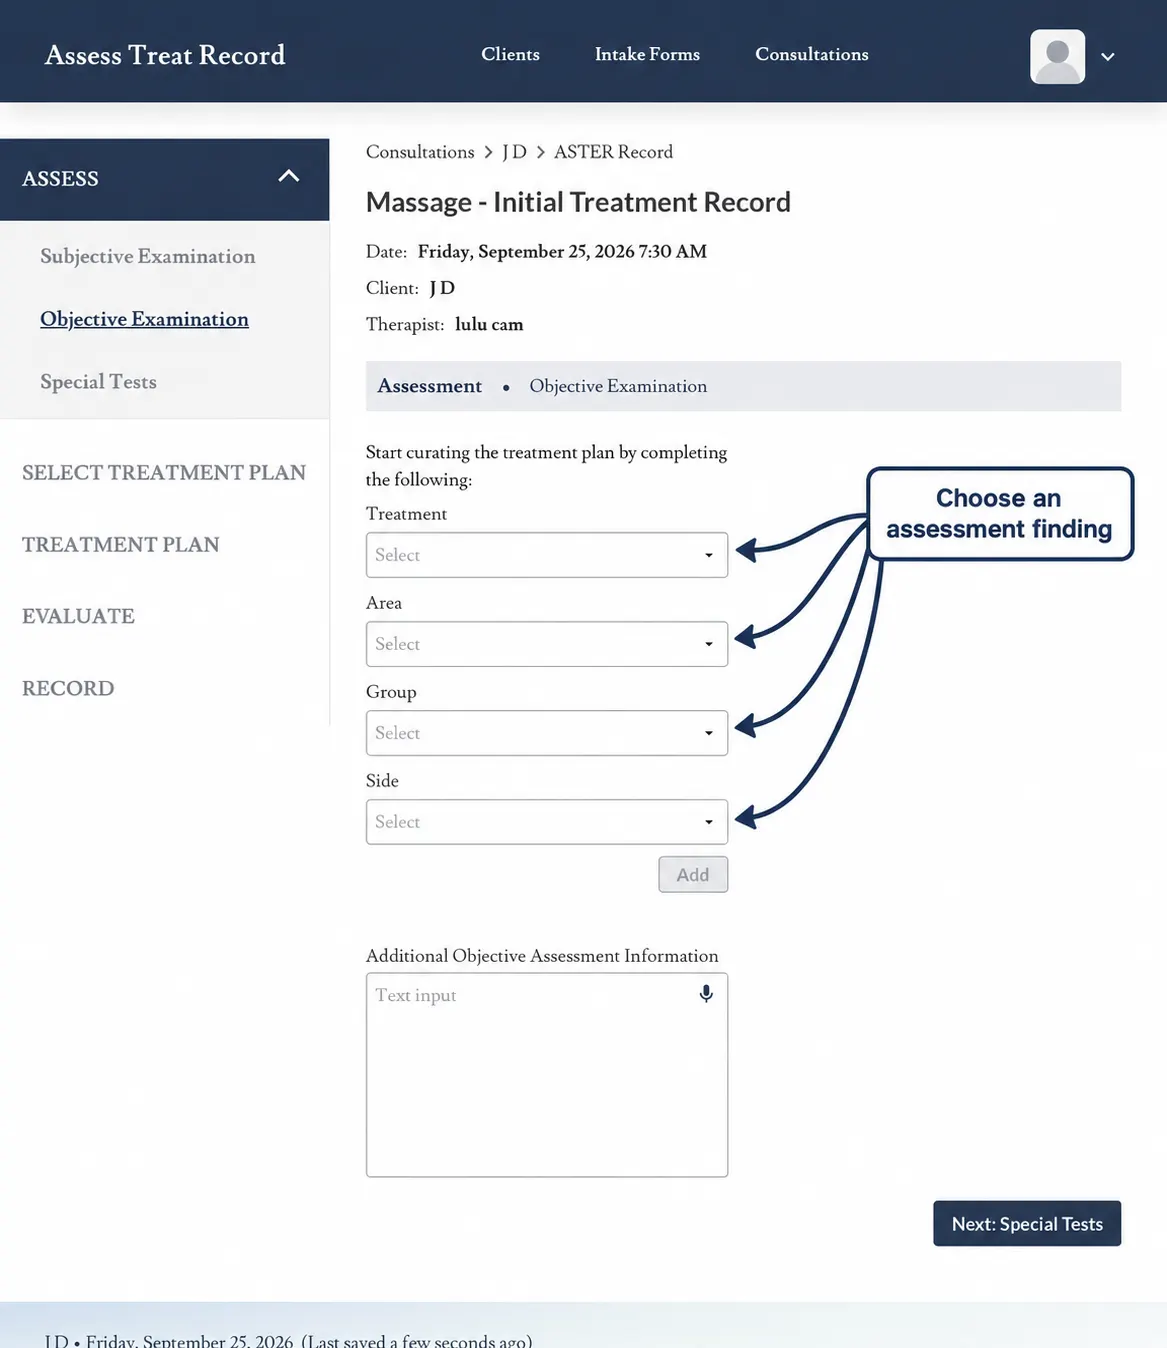
2. Select Treatment
Use the Treatment dropdown to select the relevant objective assessment category for the client.
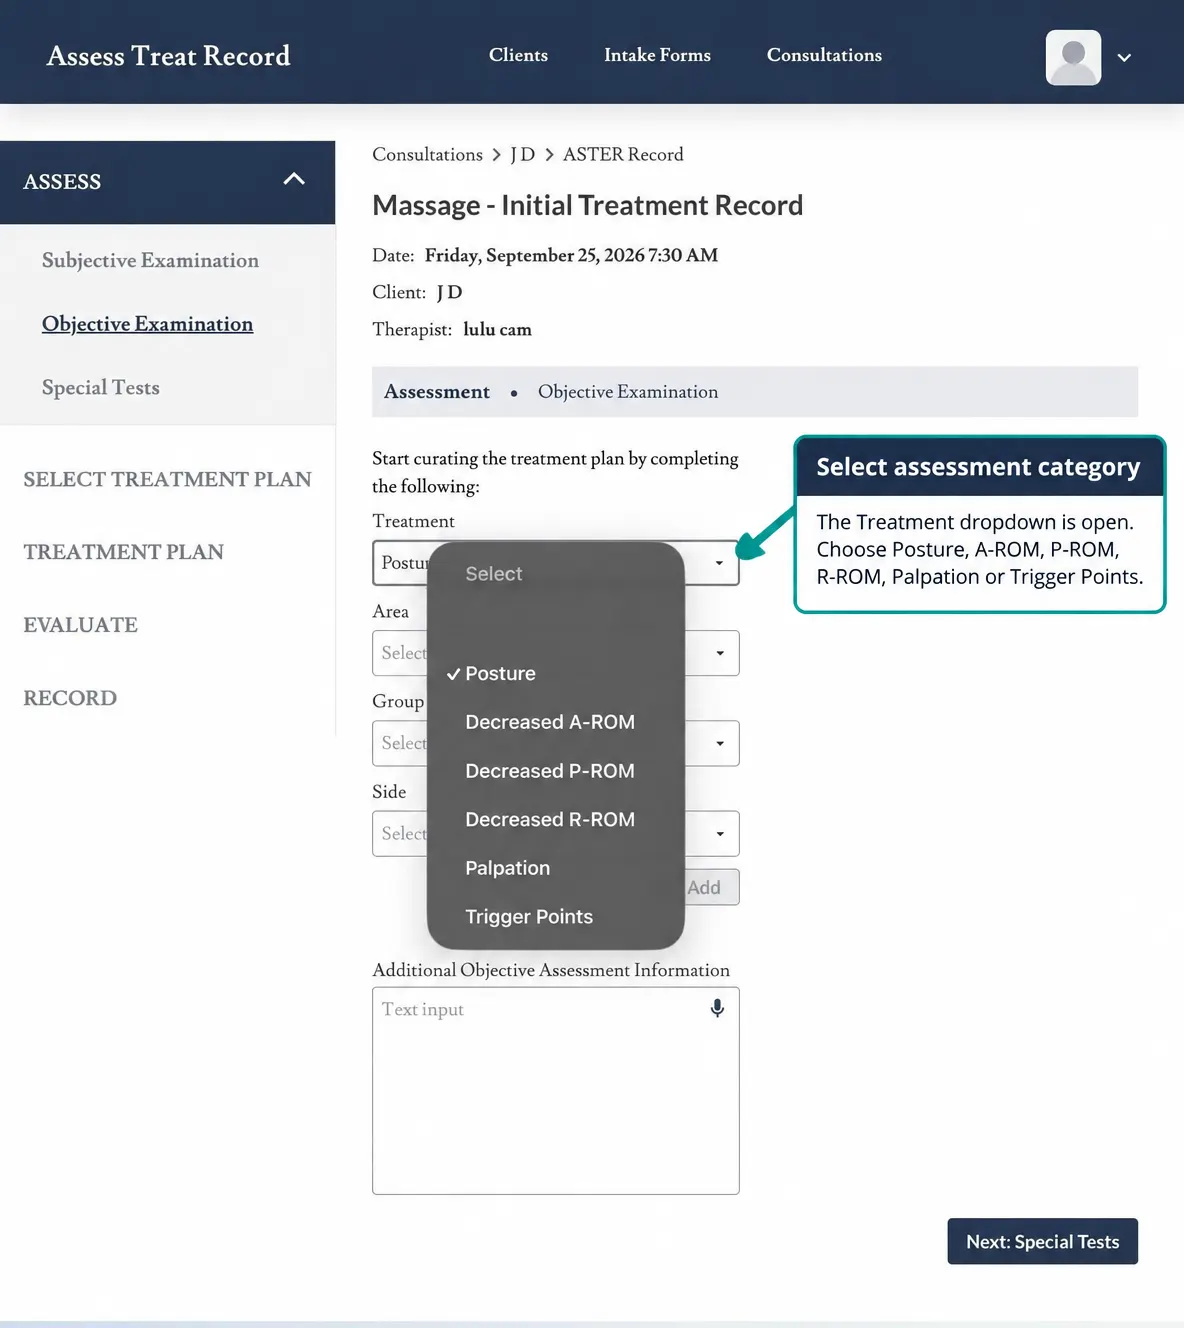
3. Select the Area
Use the Area dropdown to select the anatomical area relevant to the assessment.
Only select areas that are relevant to the individual client’s presentation and the assessment being completed.
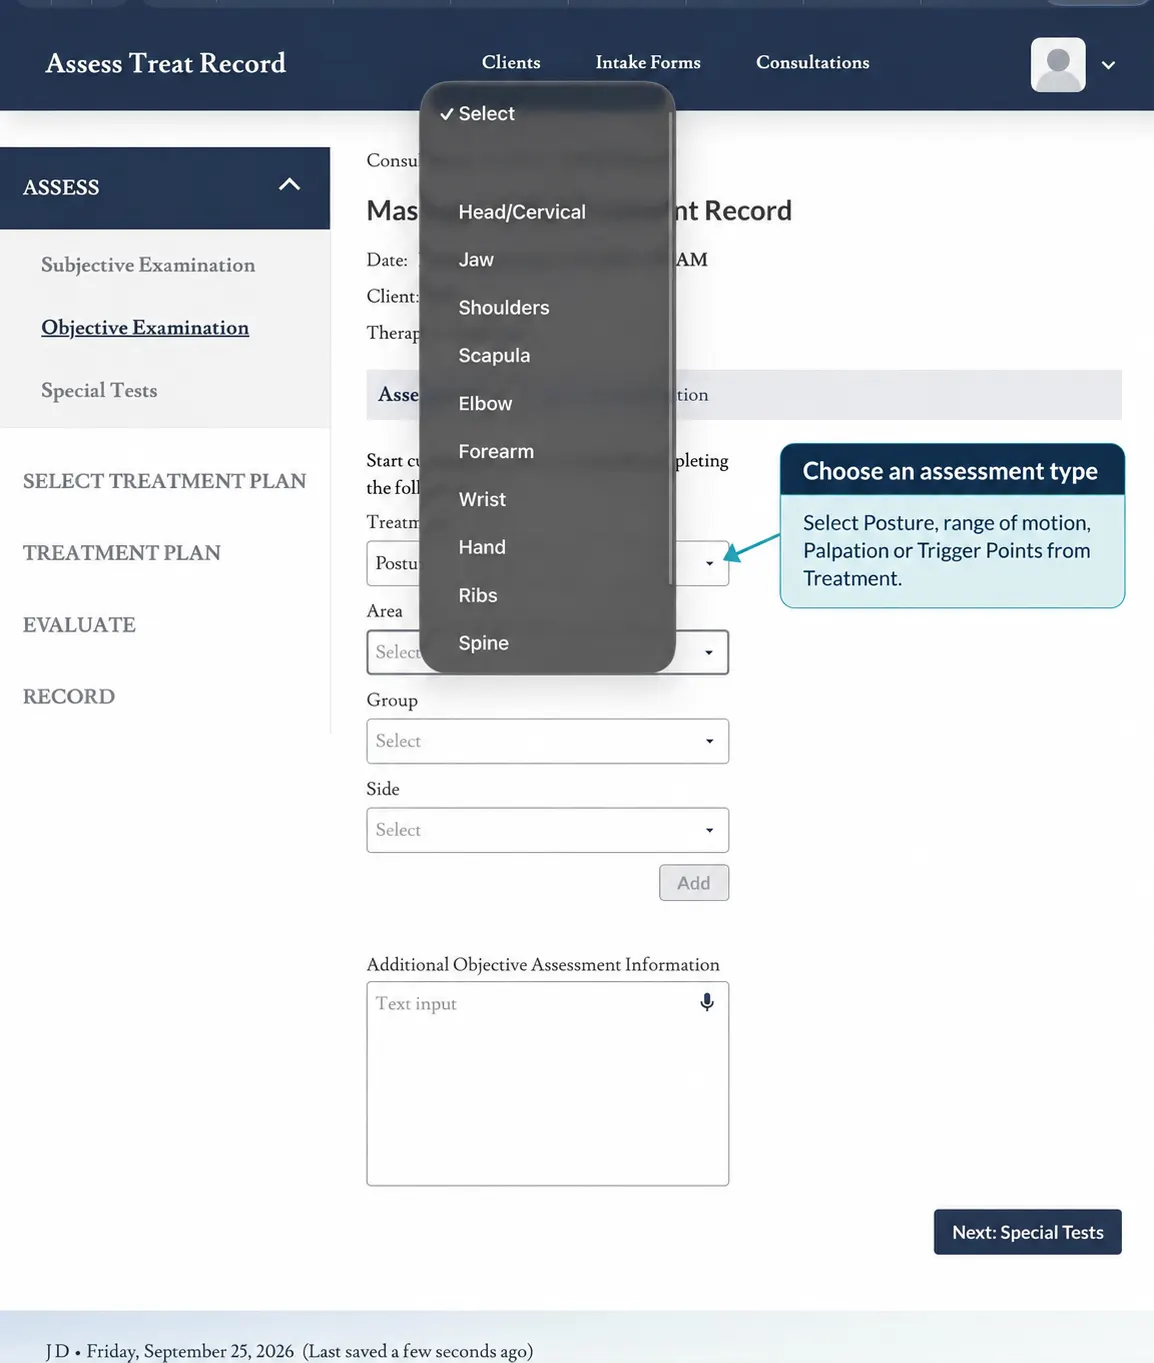
4. Select the Group
Use the Group dropdown to select the relevant group associated with the chosen assessment area.
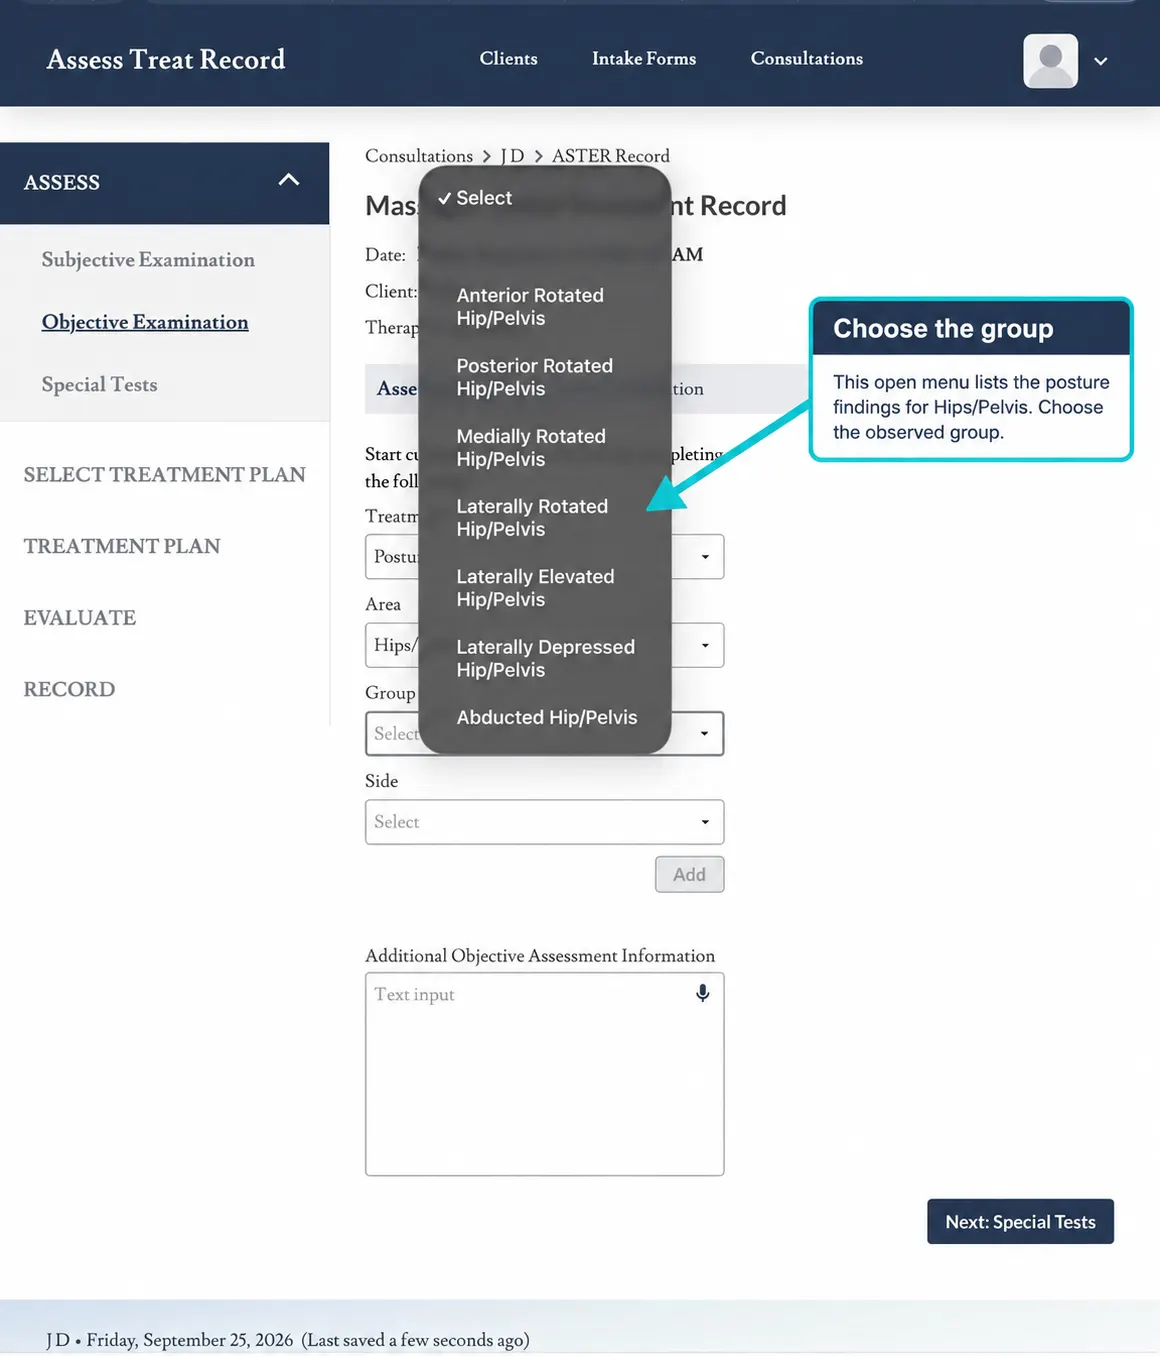
5. Select the Side
Where applicable, use the Side dropdown to identify the relevant side for the assessment finding.
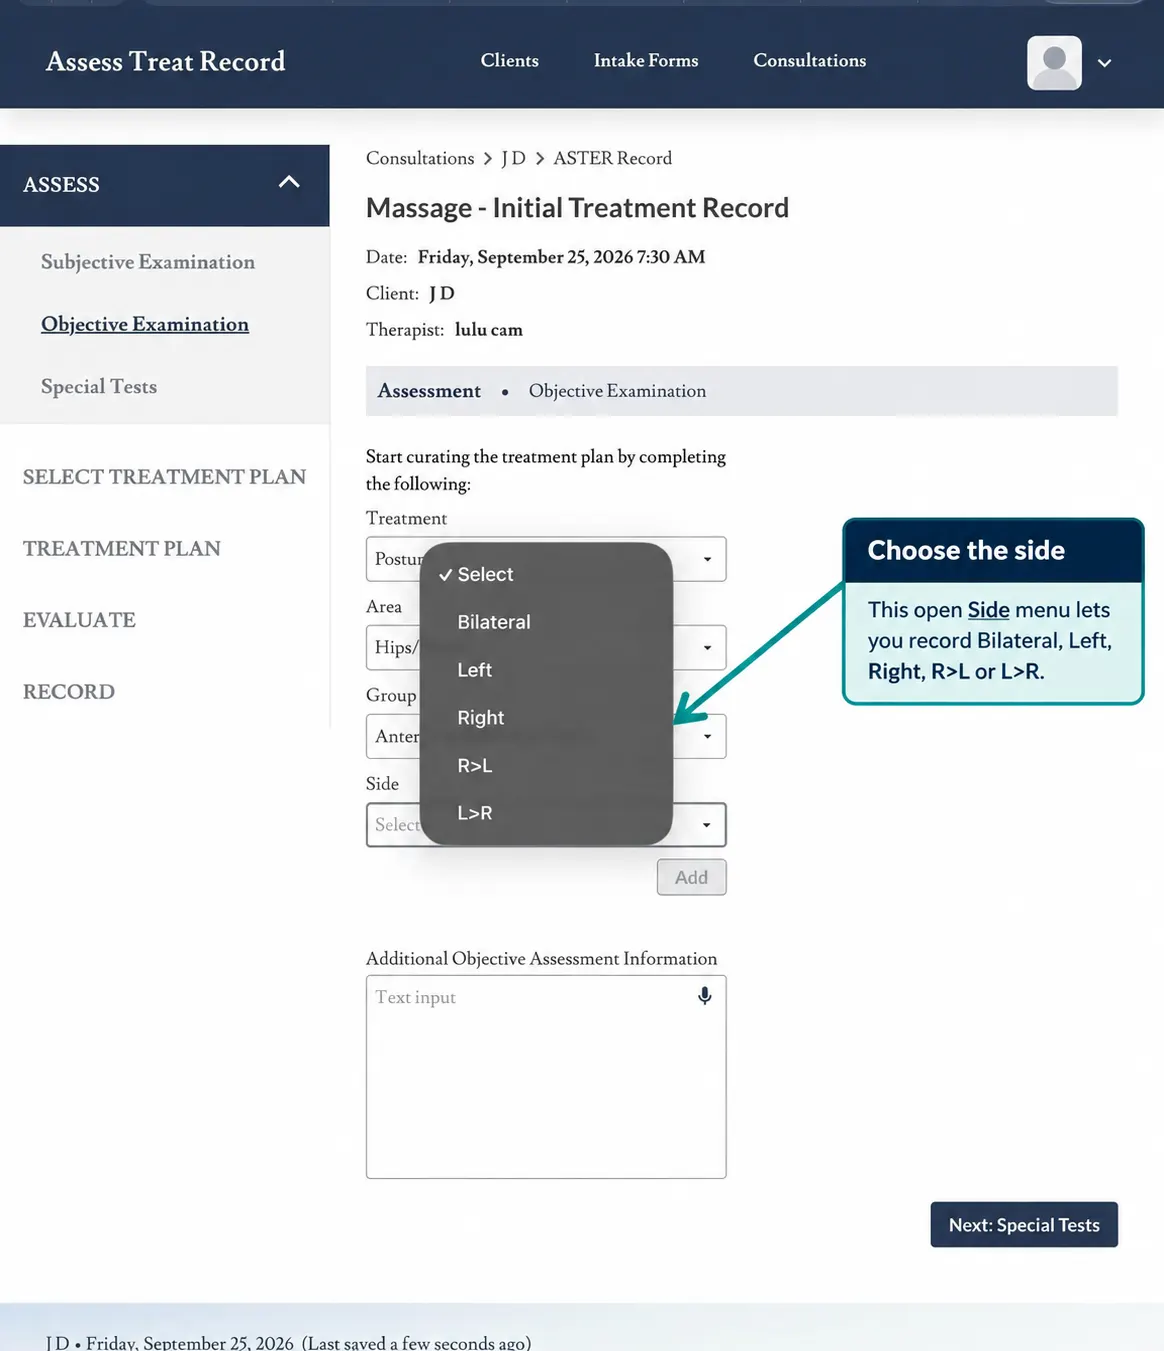
6. Add the Objective Assessment Finding
Once the relevant selections have been completed, select Add to include the finding in the Objective Examination.
Continue adding the objective assessment information that is relevant to the consultation.
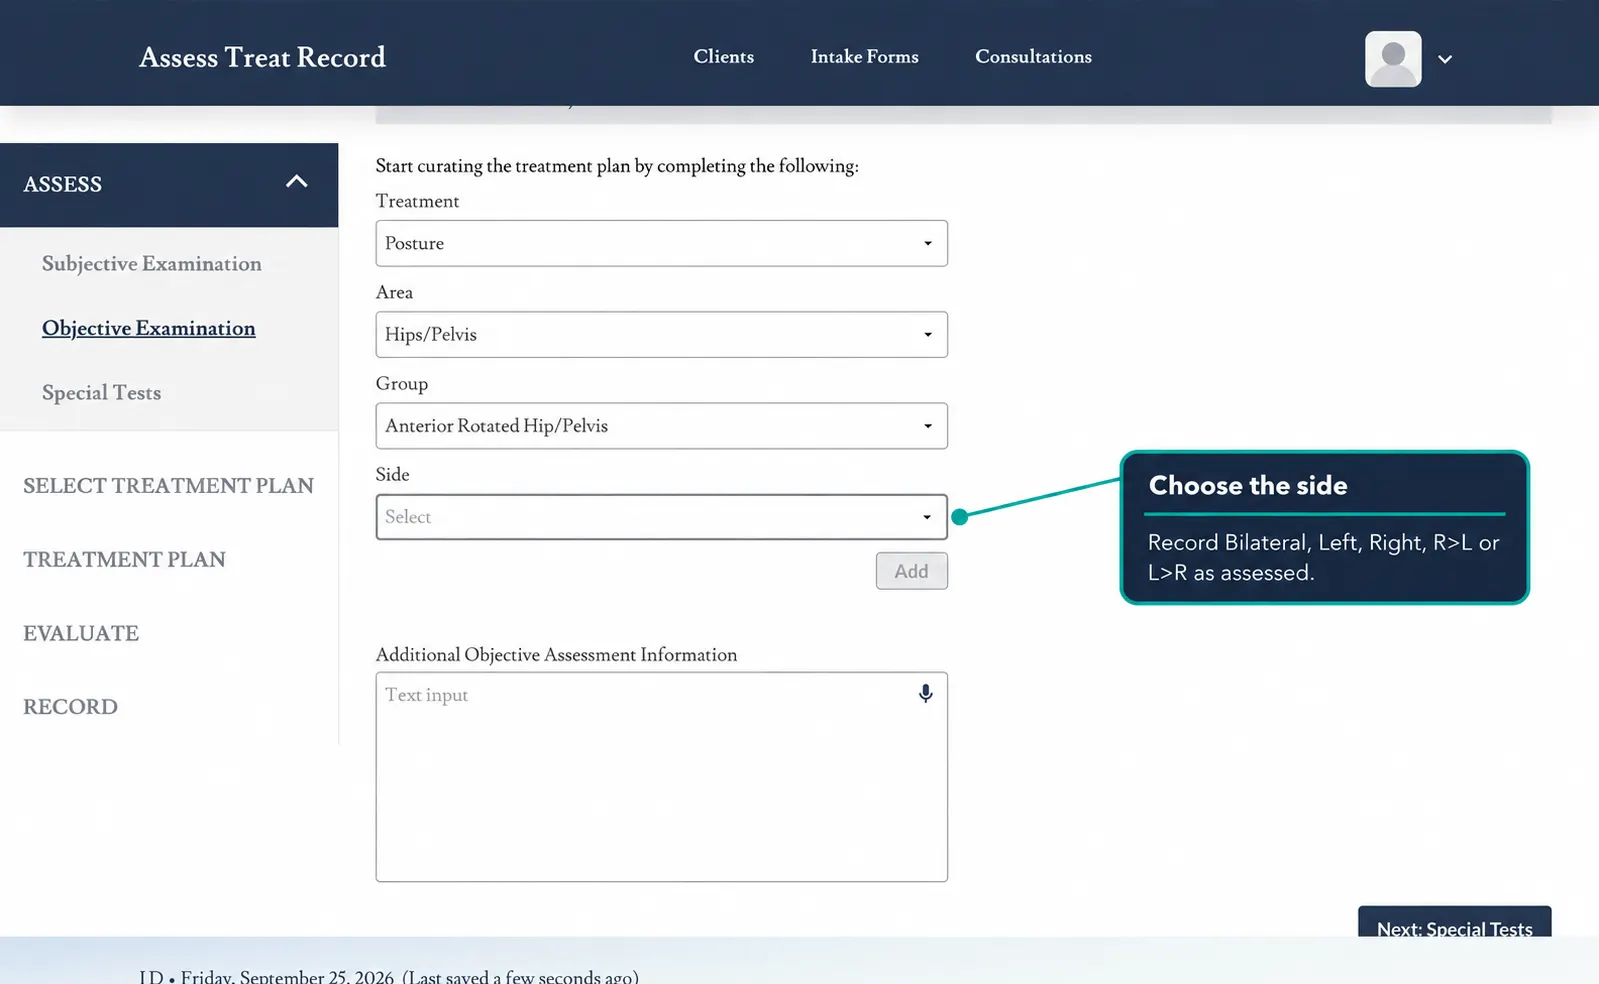
7. Add Additional Objective Assessment Information
Use the Additional Objective Assessment Information field to record relevant assessment details that are not captured by the structured selections.
Speech-to-text can also be used through the microphone where helpful. Review any dictated information before continuing.
Start Curating the Treatment Plan
The structured selections within the Objective Examination help organise the assessment information used as the consultation progresses toward treatment planning. The therapist remains responsible for clinical reasoning and treatment decisions.
Clinical Note
The Objective Examination does not require every available assessment option to be selected. Record the findings that are relevant to the individual client’s presentation and your clinical assessment.
Next: Record Special Tests
After completing the relevant Objective Examination selections, continue to Special Tests where appropriate for the client’s assessment.